Goings on in the garden: April

29 April 2018
Autumn has definitely arrived. We experienced some warmer than usual days in April but things are starting to cool down now. The trees are putting on their big display of colours and some are already almost bare.

The garden season is clearly changing around here. Most summer crops are all done and pulled out. I'm leaving the sweet potato for as long as I can until I investigate what is happening underground - hopefully something. Pumpkins are still curing and tomatillos are still ripening but that's about it. Oh, and my finger lime has started flowering - I think it may have been confused by the warm weather.

Blossoms on the finger lime.

Things have been a little busier in regards to gardening now that I've taken on my community garden plot. Not so much producing anything but a whole lot of digging has been going on in the last half of this month.

8

Baking a sourdough sandwich loaf

26 April 2018

This year I've been challenging myself to improve my sourdough bread baking. I've been working through some recipes in the book Artisan Sourdough Made Simple by Emilie Raffa as I posted about a few weeks back.

I've been wanting to add a sandwich bread to my sourdough repertoire for a little variety and the option of a softer crust. I find that unless my girls are really hungry the crusts of my free form loaves always get left behind. I think it's just too much chewing. In my youngest daughter's defense she does only have six teeth in total and all at the front so it's probably pretty hard going...but I digress.

It was great to come across sourdough sandwich loaves in the book as I had been stalling on trying a sandwich bread because I wanted to stick to the sourdough and hadn't come across many softer loaf bakes. This is probably because the delicious sourdough crust is surely more than half the appeal for those of the population that aren't too lazy to chew and have all our molars. I was also reluctant to begin looking for one as once I start researching new recipes it's a slippery slope....


My first attempt at a sourdough sandwich loaf.


8

Preserving Chillies and DIY sweet chilli sauce

24 April 2018
From the get go of growing my own food I've always had some chillies growing. Sometimes it's been one plant in a pot and sometimes several plants in the garden. Personally I feel that all edible plants look good in the garden but chillies are definitely a stand out with their structure and colourful fruit.

I like chilli to add a little hum to a dish but still allow me to enjoy all the flavours present. For me it's not really enjoyable when the chilli action takes over and annihilates any sense of taste. But each to their own!

Chillies ready for some preserving love.

So, what to do with all the chillies when you only really use a little in your cooking directly? Preserve them of course.

6

Cabbage moth/butterfly, green caterpillars and organic pest control

22 April 2018
One of the biggest benefits of growing your own food is knowing what has gone into growing it. Particularly for me it's knowing that nothing questionable has been sprayed on it either while it was growing or before it ends up on my plate.

Of course growing your own tasty fruit and veg does not go unnoticed by the local bugs and wildlife. They too enjoy organically grown fresh produce it seems.

This time of year, particularly with the warmer than usual weather, enemy number one in my garden is the cabbage moth/butterfly. They flit about laying their eggs on most green leaves they can find but are particularly enamoured with the brassica crops. I don't even attempt trying to grow brassicas over summer as these guys are too much of a pain in the warm weather.

Exhibit A: caterpillar munched broccoli leaf

If you are interested in growing things without sprays or powders or the like what can you do? Here is my three step approach.

13

Pickled eggplant

19 April 2018
For my 30th birthday I went on a food and wine road trip with my sister and a group of good friends from Canberra to Adelaide via Rutherglen and Lanhorne Creek. At one of the many places we visited we sampled some pickled eggplant. It was delicious. I'm pretty sure we all took a jar home.

Of course the jar eventually ran out and I was forced to investigate how to make this myself or face a future without it. The research wasn't too hard. Turns out the Italians have been making this for a long long time - Melanzane Sott'Olio. I too have now been making this for the past six years (I just turned 36 on the weekend - officially late 30s now).

Pickled eggplant with hommus on crackers - perfect lunch.

9

Here and Now: April 2018

16 April 2018
The last month has gone by quickly with Easter, camping and a few birthday celebrations. After a very warm start to April we've finally hit some true autumn weather. After eight years away from Canberra I think there will be some acclimatisation to occur. Yesterday it hit about 14 degrees - this is the average maximum winter temp in Adelaide!!

Dried apple slices.

20

Pesto made with breadcrumbs

15 April 2018
Pesto is a much used condiment around these parts. Each autumn I like to blitz up a big batch and freeze it to use throughout the year.

Pesto is so handy to have around, and of course pesto made from scratch is so much tastier than the jarred stuff. Pesto stirred through pasta has got to be the ultimate quick dinner, but don't stop there because it's so versatile. Here some of the ways we put it to use:

  • Spread it on the base of a pizza instead of tomato sauce
  • Add to scrambled eggs to make 'green' eggs
  • Dollop on top of soup
  • Stir through white sauce for lasagne or pimped-up corned beef
  • Use as a dip by stirring through some extra oil or something creamy
  • Pesto mayonnaise potato salad....yummo!

Purple and green basil

Each year is generally a little different as I play around with which nut to use or what to use instead. It's normally a case of what I have on hand. This year the cupboard was particularly bare of all things nut and seed like. But then my memory tugged on something that I had read or heard somewhere about making pesto with breadcrumbs and so I thought I'd give that a go.

6

Community garden plot

12 April 2018
One of the hardest parts of leaving our Adelaide life was letting go of my amazing garden. We bought our home in an established suburb that was home to many migrant Greeks and so we inherited a backyard that was all garden with plenty of fruit trees and vegie patches.

Over the five years there I managed to build the garden up to a point that it supplied most of our veg and fruit needs for day to day eating and some preserving. We were not self sufficient at all, but the closest I've ever been on the fruit and veg front.

My Adelaide garden in late Autumn last year.

We are now renting in Canberra and most of my growing is happening in pots as I ran through in my garden post last month. But all that is about to change as I've managed to secure a local community garden plot. Yay!

I had put my name down late last year but there was nothing available. However, just before Easter I was notified that there was now a plot available. So, after a quick tour of the garden and tossing it up I decide to take the plunge.

I'm now the proud gardener of 45 square metres of couch grass. Not so much yay....

My couch plot - I did inherit a globe artichoke and some bronze fennel.

In the pic above you can see my plot in the foreground and some of the gardens behind. I've got my work cut out for me, that's for sure.

Last week I started digging a patch to clear the grass and as many runners as I can. I started with a 2x5m strip (the garden is 9x5m) and have finally gotten to the end this week.

The next step in my plan is to plant my garlic, potato onions and broad beans out. If I have any extra space left I'll add in some advanced brassica seedlings or leafy greens. Then I'll just keep on clearing in similar sized strips until I reach the end. Depending on the time I'll either plant some green manure crops to improve the soil or once it's too cold I'll cover with cardboard/newspaper and mulch to keep the couch at bay.

In good news this unseasonably warm autumn weather means my planting window is still open.

So, that's what I've been up to.  I'll still be planting a lot around home in pots but this will give me a lot more ground space....once you can see the ground that is.

What challenges have you taken on recently in the garden or life?
Any advice for organic couch grass eradication?


8

Milk carton wicking pots and cloches: garden upcycling

10 April 2018
I'm a bit of a fan of upcycling in the garden. Well, I'm actually a fan of upcylcing everywhere. I like to make do with what I have on hand and find a way to reuse something else for a task rather than buy new.

This doesn't always lead to a magazine shoot worthy garden but it gets the job done.

One of my favourite and most used garden up-cycles are milk carton wicking pots. I read about these in the book DIY Garden Projects by The little Veggie Patch Co crew (It's well worth checking out from your local library if they have it).

'Red Giant' mustard leaves happily growing in their upcycled home.

They are super simple to make. I'll let the pictures run you through it.

Take a plastic milk carton and cut it in half. Grab a bit of old cotton material.

Stuff the material through the 'top' of the carton with some inside and some outside.

Nest your two pieces together.

Fill with desired growing medium and plant. Here are some various seedlings.

I use these a lot to plant up seedlings before they are ready to go in the ground. This year, growing in pots mostly, I'm experimenting with growing leafy plants in them for the long haul.

Another great use for plastic milk cartons is as garden cloches. They offer protection to small seedlings from a variety of things. This time of year they are great for keeping the cabbage moth butterflies off delicate brassica seedlings. The top half is easiest to use as it does let a little air flow through and you can push a stick through the opening and into the ground to keep them anchored on your plant. The bottom half offers more complete protection and creates a mini green house. I just sit a rock on top to stop it flying away.

Here they are in action in my Adelaide garden (see, not magazine shoot worthy)

To store the cloches when not in use I stick a stake in the ground and slide them on. You may be able to see them near the chicken pen in the pic above (but it's a little small).

Once they've finished their use they still end up in the recycling but I like the fact that I've eeked a little more purpose out of them and kept the garden growing better too.

Got any other uses for milk cartons in or out of the garden?
Do you aspire for 'magazine shoot worthy' or more function over form gardening? (not that they can't coexist)

12

Eating with the environment in mind

08 April 2018
I went to a workshop last week titled Mindful Eating. The focus was on being mindful about how what we eat impacts the environment. The key statistic highlighted was that food is responsible for around one third of our global carbon footprint. Of course this kind of statistic can be calculated in lots of different ways - but it's clearly a big impact.

As I've moved towards more values based eating my food choices have become more deliberate. I wasn't alone on the night in being one of the already converted in the audience - but it was a good reminder in keeping these issues front of mind.

Gratuitous flower shot - I didn't have any specifically related pics.

It's no surprise that animal based protein foods had the biggest carbon footprint and plant based protein the least. The most interesting tidbit for me was that the researcher highlighted that even if you shipped your plant protein (eg.lentils) from across the world they'd still have a lower footprint than animal proteins. I think I would still try to choose local for a whole lot of other reasons but it was interesting to learn that food miles may not be as big a factor from a carbon footprint point of view than I had thought.

The workshop was not trying to get anyone to choose any one style of eating but rather present the information and provide some resources to help people make food choices that are mindful of the environment. The key factors that seemed to have the biggest impact on carbon footprint was farming practices and processing. This talk focused on protein foods but I also think 'extra' foods, which are extremely processed, must play a pretty big role. Also, these foods aren't necessary for our daily nutrition so they'd be an easy target to reduce. And dare I say perhaps more palatable for the average Australian who is reluctant to consider a life without meat!

Peppermint that will soon be dried for tea.

So what do we do around here? A lot of things really - cooking from scratch, growing what we can and all those standard simple living practices. Specifically around protein foods:


  • Include minimum two meat free meals per week
  • Base meals around vegetables rather than protein - I generally plan my meals based on what vegetables I have to use and I make these the star rather than the side.
  • Smaller meat serves - many meals have token animal based protein eg. bacon in a pasta sauce or roast pork in fried rice. This keeps the content down but keeps other members of the family happy that we are actually eating meat.
  • Include legumes and lentils more regularly - either as stand alone protein option or as a way to 'water down' the meat.
  • Eat meals from a variety of cuisines - many other countries do not have the same focus on meat that we do in Australia so this helps to shift the ratio in a meal while trying something new and tasty.


Do you do anything different at your place?
I'd love to trade tips among us in the comments - sometimes what we do every day is something new for someone else.

P.S The event was run by SEE-Change. They have lots of resources and info on their website. If you are in the Canberra area they regularly run interesting events (events page).


12

Making your own vinegar (without a mother)

05 April 2018
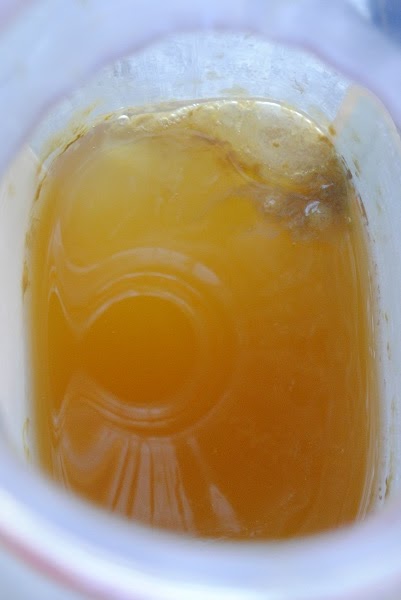
One of the jobs in the kitchen recently was to replenish my stock of apple (scrap) cider vinegar. I stumbled across the concept of fruit scrap vinegar while reading Sandor Katz's Wild Fermentation and The Art of Fermentation many moons ago. I liked the idea of turning food scraps into something useful and also adding another made from scratch item to the pantry. It was a little while however until I took action and attempted my own (as you know, I don't like to jump into things too quickly!).

My first attempt was using some quince scraps from the garden after making a batch of quince paste. Unfortunately it was not the success I had planned. Bits of the fruit bobbed to the top and I started colonising a whole colourful community of mould. Off to the compost pile...


I love the 'star' when you cut apples this way.

I really wanted to give apple scrap vinegar a go so I saved peels, cores and discarded bits and pieces  in a bag in the freezer until I had enough to attempt take two. Learning from my mistakes I ensured the fruit stayed submerged using a piece of plastic lid cut to size for my jar. Success this time, and it's been a regular on the made from scratch list ever since.

The process itself takes a few weeks but requires very minimal effort. Basically you dissolve a little sugar in some boiling water, then top up with room temp water and pop in your fruit scraps. Add something to the top to ensure it all stays submerged and cover with some muslin, a clean chux or a tea towel to keep bits out and allow gas to escape. Then leave it for the microbes to do their thing.

I generally use a ratio of 1-2 Tablespoons of sugar, about a kilogram of apple scraps and enough water to cover. The more apple scraps you use the stronger the apple flavour, but you can use less and either make a smaller batch or have a more subtle apple flavour. If the water where you live is heavily chlorinated you can pour some into a jug and sit out on the bench overnight before you make your batch. I don't find I need to do this where I live. If you have rain water to use, all the better.


Apple scraps from the freezer - not the most photogenic things!


For the first week it's a good idea to have a little look each day and give your mix a stir. This adds extra air, helps the microbes start doing their thing and reduces the chance of surface mold forming before the 'good' bugs have taken a hold. Once the ferment stops actively bubbling - usually close to two weeks around here but it will depend on temperature etc - you can strain out the apple bits with a fine sieve or muslin (or clean chux) lined colander. Pop your vinegar into bottles or whatever you plan to store in and leave for another week or two with the lids off, but covered loosely.

You can taste test along different steps of the process to get an idea of how things are changing. The acidity and flavour will continue to change over time.

I'd recommend checking out Sandor Katz's books if you are interested in learning more about fermentation and how to do it. He is definitely the go-to guy in all things fermenting. There is also a great how to on the Down to Earth blog for making your own scrap vinegar if you need to do a little further research before diving in.

I've made a few batches of the apple cider vinegar successfully since my first attempt and also given the recipe a go with pineapple scraps and mango skins. Both worked well and created a fruity vinegar great for adding a tang to salads and dressings. You can also use fruit scrap vinegars in any home-made cleaners or hair products.

Mango vinegar - you can see a 'mother' forming in the corner.


It's not advisable to use home-made vinegar for preserving that you are not going to keep refrigerated as you do need a minimum acidity in shelf stable preserves to ensure they keep the nasty bugs at bay. But otherwise fruit scrap vinegar can be substituted with the bought stuff wherever you like.

Fruit scrap vinegar is a great way to reuse kitchen waste and a ridiculously frugal ways to stock the pantry with flavoured vinegars of all kinds. So, what are you waiting for?

Have you ever tried making vinegar at home?
Any other ways that you use up your fruit scraps?
12

Working on my sourdough bread

03 April 2018
Lately I've been experimenting with my sourdough baking. I mentioned in an earlier post that I'm keen to try new recipes and improve my everyday loaf. I feel like this year is a perfect time to do it as I have a little more time on my hands with my eldest  off to pre-school and living in a rental without my large food garden (sad face).

I received a copy of  Artisan Sourdough Made Simple by Emilie Raffa for Christmas and have started working my way through a few recipes. I read about this book over on Fig Jam and Lime Cordial which is in itself a great resource for sourdough baking. Celia had posted about a few recipes she had tried from the book and they looked so amazing. I was sold.

Everyday Sourdough

It was opportune timing as I had been thinking a lot about working on my baking skills and as immensely useful as blogs are I do like to have a book as a reference as well. I promptly dropped a hint to my husband that should anyone be looking for a Christmas gift for me this book could be a good option. And by dropped a hint I mean I texted him the book depository link which he eventually passed on to an interested party.

Cinnamon swirl bread.


When I finally got around to  making my first loaves from the book I wasn't disappointed. I started with the Everyday Sourgdough and Cinnamon Raisin Swirl. The recipes use a small amount of starter and a long bulk fermentation (which is the first rise of sourdough making) which I was keen to try out.

Everyday sourdough loaf crumb.


True to form I did deviate from the recipe for the Cinnamon Raisin Swirl. I used dried cranberries instead of raisins and sunflower seeds instead of walnuts as these were what I had on hand. I also chose to bake it in a loaf tin rather than free form.  However, I didn't let them rise in the tin enough before I put them in the oven. This was an oversight on my part as further reading of the loaf baking section shows that the dough should be proved a little longer for the final proof compared to a free form loaf and baked at a lower temp. Room for improvement next time.

Cinnamon 'cranberry' swirl proving.


I was really happy with the overall results. As you can see I'm no expert sourdough baker but the bread was more than edible, had a great crumb and mostly looked the part. In fact the Everyday loaf was gone in one day. So I think I'm onto a winner there.

Have you been baking anything new lately (bread or otherwise)?
Where do you stand on the whole recipe following thing – to the letter or a bit more laissez-faire?


P.S When I read the book I realised that I was actually familiar with the author's blog. Her post Sourdough Bread: A beginner's guide had formed part of my drawn out extensive research on sourdough before I jumped down the rabbit hole. Heaps of great info to get your head around the whole 'sourdough thing'.


10

Search This Blog

2018. Powered by Blogger.