Sourdough hot cross buns

31 March 2018
Home made vs shop bought is no competition when you're talking about hot cross buns. I remember being blown away the first time I tried home made. 

Hot cross buns cooling to 'eatable' temperature.

I attended a very small (12 kids) primary school for a year and as part of our classes in the lead up to Easter we made hot cross buns. There were always baked goods around our house as a kid but my mum was scared of baking with yeast and so I'd never had any home made bread or bakery items. Twenty five years later and I can still remember how good they tasted.

I've been making my own buns for a while now but have generally stuck to yeast based recipes. My go-to for several years has been Donna Hay's hot cross buns from her Modern Classics Volume 2. These have been a great performer. I generally skip the peel but otherwise I stick to the recipe on this one (something different for me).

Since I jumped down the rabbit hole that is sourdough baking I've been contemplating sourdough hot cross buns. I've been researching sourdough hot cross buns. And then back to contemplating sourdough hot cross buns. But this week, when mixing up some loaves of bread, I had some excess starter that was all awake with nothing to do. The time had come....for more research. Just kidding, although I did need to do a quick google to find a recipe. I went with this one.


Buns proving before they get their crosses.

A couple of changes that I made to the recipe (you're shocked right?). I didn't soak the fruit, I just mixed it in. I added a little dried pear from a recent forage find along with the sultanas. I used mixed spice instead of allspice - I'm not sure if this was a typo or lost in translation thing but you've got to have mixed spice in your buns. I stuck with all white flour and I actually needed to add a little extra to get a dough that I could roll into balls. Lastly I skipped the glaze. If I was serving these immediately and eating them all at once (with others, not by myself) I'd probably go with it but frankly I find glaze messy in the storage container. Oh, and super super sticky and messy in the hands of two children.

One a penny, two a penny....

Overall I'm happy with my first foray into the land of sourdough hot cross buns. I'll definitely give them another whirl next year and see how my 'refined' recipe performs.

Have you been baking any hot cross buns this Easter?
If you prefer to buy, do you jump in when they appear in January or hold off until closer to?
14

Fermented tomatoes and tomato salsa

30 March 2018
I interrupt my normal broadcasting schedule to bring you a bonus post. If you've found your way over here from Rhonda's blog I'd just like to say hi and extend a very warm welcome. I hope you enjoy perusing my little space on the interwebs.

I generally post Tuesday, Thursday and once over the weekend, but as I knew there might be a few new readers coming over I thought I'd put up something new. Also, I thought an extra post to check out over the long weekend might be welcome to those with a little time on their hands. And speaking of time - I wanted to put up this post before all the tomatoes disappeared so that if you get inspired you still have time to give it a go.

The bulk of my tomato preserving is straight up in the bottles as I talked about earlier this week, however I also like to put up salsa, sauces and chutney if I can source enough tomatoes. I have dreams of one day being able to grow enough for all my preserving needs but alas I'm not there yet so I just source them from the markets or independent fruit & veg shops as I need. But I digress...

I've been intrigued by fermenting tomato salsa. Ever since my success with cucumbers I've wanted to start trying out other veg to see what I like and what gets eaten. So this week when I saw bags of tomatoes at a good price I thought I'd have a little dabble.

After a lot measured amount of researching recipes and how to guides I was ready to start.

Ingredients washed and ready to go.

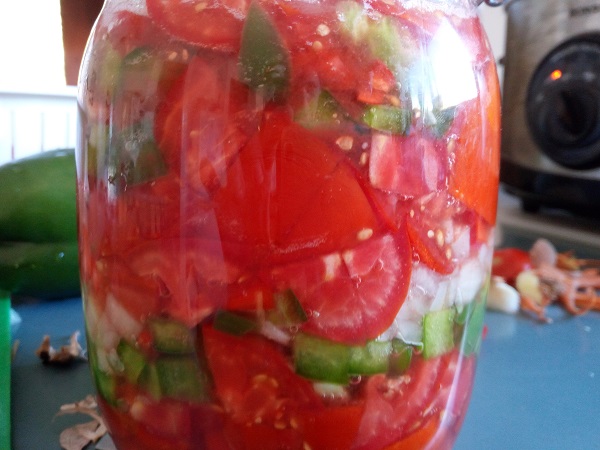
For my batch I used about 6 tomatoes, half an onion, 1 green capsicum, 2 cloves of garlic, 2 chillies, 1 teaspoon coriander seeds and 3 teaspoons of salt. How much you use will depend on the size of your jar and the ratio of the ingredients you want. There is no right or wrong. I obviously went for a more tomato dominant salsa but you could add more onion or capsicum if you like. If you want a hot and spicy salsa feel free to add more chillies. You could also use fresh coriander leaves but I just had seed on hand so went with that. The only ingredient you want to be careful about changing is the salt - you need a certain amount of salt to get the right mix of bugs in your ferment to do the things you want and stop the things you don't want.

Colourful layers in the jar.


I decided to chop my ingredients up and layer in the jar but you could mix in a bowl and then stuff in - whatever works for you. Once you've got it all in the jar give it a good squish down with the back of a fork. This pushes the solid bits down and lets the liquid float to the top. You want to make sure all the 'bits' are submerged under the liquid. If your tomatoes haven't produced enough liquid top up with some water or lemon juice if you want a bit of a zing (you could even add this in the mix either way).

After a good 'squishing'.

And that's it. Now you just need to place your jar in a spot on the bench where it wont get disturbed and is out of direct sunlight. Cover with a cloth or lid on top loosely to allow gasses to escape and keep things out. I generally leave my ferments on the bench for 3 days and then pop in the fridge, but it's really up to you and your own taste. The great thing about ferments is you can just taste them each day until you are happy with the flavour, just use a clean spoon each time to avoid contamination. As an aside I think one of the biggest benefits of making things yourself is the ability to tailor things to what you like and what's available. Once ready pop in the fridge. Most of the info suggested the salsa would keep well for up to six months.

After 3 days - you can see bubbles around the edge and a couple in the middle, the liquid is a little cloudy and nothing 'suspect'growing on top - fermenting win!

While I was going I decided to have a go at fermenting a jar of whole tomatoes, and because I had it on hand I popped in some capsicum too. For flavours in this batch I added a clove of garlic chopped and a teaspoon of fennel seeds. I did need to weigh these down a little to keep the tops of the tomatoes submerged. I generally use a circle of plastic that I've cut up from a container lid as It's flexible enough to get under the jar rim but easy to remove.

Whole tomatoes and capsicums ready for the bench treatment.

I've popped both these ferments in the fridge today after a sneaky taste test. Delish. I look forward to using the salsa to add a bit of a lift to Mexican dishes through winter. I think the other veg is likely to end up on a few lunchtime platters.

I think I can safely say that I will be adding both these fermented tomato goodies to my  preserving list for next year. And, if I spy any further well priced bags of tomatoes before the season ends I might just snap them up and put away a few more jars. I think I need a preserving fridge.....

Have you been preserving much as summer winds down?
Ever tried fermented tomatoes or salsa?
12

Seasonal eating

29 March 2018
Eating seasonally has been a big part of connecting to where my food comes from and ultimately my food values.

With our current food supply system you can pretty much get any food you want at anytime of the year in most parts of the developed world. The only seasonal changes in what lines the supermarket shelves seems to be when they are trying to thrust holiday foods in our faces three months out from the actual event (I'm looking at you hot cross buns).

Tomatoes fresh off the vine - you can't beat that taste.


There are so many choices we can make around what we eat - organic, local, free range, fair trade to name just a few. Seasonality is just one factor when it comes to food, but for me it was an easy place to start. I've focused on seasonal eating of fruit and vegetables but there was a time when most of our food supply was affected by the seasons.

I must admit I didn't really think much about food and seasons before growing my own. Sure, I knew certain fruits grew in summer and tasted better then. I also knew that fruit and veg would be cheaper when in season but it didn't stop me from necessarily buying out of season. I'd buy zucchini and capsicum all year long for dishes and munch on apples right through until spring. The reason I didn't buy something had more to do with price (which of course carried some element of seasonality) or it not being on the meal plan that week.

Basil thrives in the summer sunshine (frost, not so much)

Seasonality was an easy marker to use as I started to connect more with food and make more conscious choices. Buying in season increased the chances that what I was buying was coming from somewhere near me (no guarantee but a good first step on my journey).  Farmers markets were a great place to build my knowledge of what was in season and what actually grows in my area. I didn't always buy everything I needed from the farmers market but it helped to increase my awareness.

Growing my own took that awareness to a whole new level. Plants just wont grow when they aren't meant to (and sometimes they wont grow for a whole lot of other reasons too!). Looking at planting and harvesting guides was a great way to get a feel for what grew when. Even if you aren't into gardening these guides can give you a good awareness of what's in season. If it's not the right time of  year for something to be growing in the garden, and you see it for sale locally, chances are it's come from a long way away or been grown using more resources.


Strawberries are definitely a seasonal delight

Once I had a little knowledge under my belt it was easy to make choices around only eating what was in season. And once I started eating seasonally there was no going back for two key reasons: taste and anticipation.

Regardless of food ethos or values I think most people would consider taste and enjoyment of what they eat as being pretty important. And really there is no comparison between something grown in or out of season. Have you had strawberries or tomatoes in winter? How about grapes or pumpkin in springtime? They're generally flavourless and sometimes even have an unappealing texture. Now, think of a piece of stone fruit enjoyed straight from the tree in summertime or a crisp autumn apple. I'm sure you can conjure memories from your own experiences of eating food at the height of its season. It really was a no-brainer for me once I got started.

Anticipation was an unexpected benefit. When you eat seasonally some foods are off the menu for certain periods of time. The anticipation of foods coming into season and the anticipation of the enjoyment of these foods was heightened. In turn the actual enjoyment of the foods was also heightened because I'd been looking forward to them (Science nerd alert: there is even research on the positive emotional impact of anticipation).

These days eating seasonally is second nature for our family. My oldest daughter even associates certain seasons and months with certain foods which warms the heart of this food connection focussed mamma.

If you haven't already, I'd encourage you to think about how seasonal eating could fit into your food choices if only for the amazing difference in taste and enjoyment that you'll get to experience.

Do you have a favourite seasonal food memory?
Do you eat seasonally? If so, what are the main benefits for you? If not, are you game to give it a go?

4

Preserving Tomatoes

27 March 2018
Summer is well and truly over in Canberra. I've had to pull out the nanna knee rug two days in a row this week! Luckily I've been busy preserving little bits of summer to enjoy for the cold wintery months ahead.

My biggest summer preserve this year was tomatoes. For the past five years I've been bottling my own tomatoes to substitute tin tomatoes and tomato passata and making my own tomato sauce. The taste of home preserved tomatoes is much nicer, I can source local tomatoes and I can reuse my jars. Triple win.

The first year I went the whole hog, cooked down the tomatoes and put them through a hand operated strainer and bottled them up. It was a lot of work. The second year I had a two month old baby on my hands and so I found an easier way. I'll let the pictures do most of the talking here.

First, get your hands on some tomatoes, sort out any not so fresh ones and wash the rest.


Get chopping into quarters, sixths or eights depending on size.

Start filling your jars and squishing the tomatoes as you go - I use a chopstick.

A comparison between the squished and non-squished jar from the top.

As you can see from the pics I use fowlers vacola jars. Previously I was doing the tomatoes in old passata jars that I saved and reused but I rehomed these in our move. So just use what you have. If you don't want to go through the preserving process you could just freeze whole or chopped up tomatoes and spend the saved time sipping a tasty drink in the summer sun.

Once your jars are full you need to add a little citric acid or lemon juice to ensure they are the right acidity for water bath preserving. My instructions advise 1/4tsp citric acid or 2tsps lemon juice per 600ml jar and 1/2tsp citric acid or 1Tblsp lemon juice per 900ml jar. You can find citric acid near the baking powder at your supermarket.

Now it's time to pop on your lids and relevant sealing paraphenalia for your jar of choice and process in a water bath. I use my fowlers vacola unit but you can do it on the stovetop (check out this site for water bath canning instructions).

Out of the water and into the pantry they go.

Once cooled you can stock up your pantry and feel free to open the door whenever you pass to enjoy the sight of your beautifully preserved bounty.

Now, if I'm using these in place of tin tomatoes I just put them straight in my recipe. If the recipe calls for passata I may (or may not depending on importance of smooth texture) give these a blend with my stick blender to puree them up. A small note to keep in mind - because we aren't reducing the tomatoes some varieties can be a little more watery so you may need to reduce other liquids in a recipe a little or just simmer your recipe for a little longer.

And that's my quick and easy way to preserve fresh and tasty summer tomatoes for enjoying in the depths of winter and hungry gap of spring.

Do you preserve tomatoes?
Are you a quick and easy convert or a full blown passata day traditionalist?


5

Goings on in the garden: March

25 March 2018
I've been writing a lot about food and eating as I've gotten started in my blog and have been sorely neglecting my other love - growing food. It's probably a little to do with the fact that I'm adjusting my gardening at the moment to work in a new climate and also a different space.

Most of my gardening is currently happening in pots as we are renting. Previous to this my whole backyard was a food garden in Adelaide. In fact my oldest daughter spent the first week wandering around our rental garden asking what were the things she could eat and where was the fennel.

So, I thought I'd take you on a little tour of my current garden and chat about what is happening.

Pots around edge of patio - fig, guava, chilean guavax2, feijoa x2, jostaberry, herbs, strawberries, warrigal greens and an assortment in the plastic tub (see below).

The strawberries are producing so many runners at the moment. That basil will soon be pesto.

Tub from corner of top pic - beetroot coming to an end and a pocket melon that you can just see in the top right corner. Have put in some new carrot seedlings but I think I need to add some extra soil to this tub. 

Here are the pocket melons nestled in an adjacent pot. These were a seed freebie from diggers. The ripe one is about 8cm long

A lot of the pots I brought with me from Adelaide. My dear dad trekked over and loaded up a trailer full of my numerous trees and shrubs that I just couldn't leave behind. I also took the opportunity to gather a heap of herbs from my existing garden so I didn't have to start from scratch. The plastic tub was a moving casualty that I put to good use as a wicking bed. The beetroots have done ok, only growing to about golf ball size but good for grating into a few summer salads. I'll refresh the soil in here and maybe try growing a few leeks. These will of course sulk all winter but hopefully reward me with an early spring harvest - one can live in hope.

The bare dirt behind the patio didn't last long - in went some beans. Fig in the big pot with a few more Adelaide transplants - a loquat tree and some horseradish.

I think we had been in our new place about a week and a half before the urge to plant something was too strong to overcome. This patch of bare dirt was just calling out to me. I popped some beans in here in the hope of helping the soil out a bit. I've managed to harvest a few handfuls off the vines but clearly the plants aren't thriving. I'm tossing up between putting in some broad beans here or doing a green manure crop over winter and digging that in before spring planting.

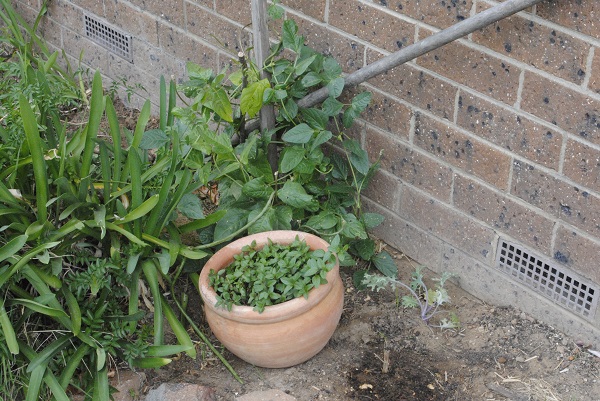
Behind the brick wall you can see my cucumber vines peeking out. In the pot are a red shahtoot mulberry and mint.

Another bare patch of dirt in the pic above became home to my cucumber vines. These vines have been one of the few in-ground successes as I've managed to harvest enough to pickle and ferment. Mint has been harvested several times over summer and dried for tea. Nothing happening with the mulberry this time of year but it will soon lose it's leaves and then hopefully gear up to deliver some tasty springtime fruits.

Snake beans, peppermint and  red russian kale seedling.

Another bare patch of dirt got the bean treatment. I think I'll give up the ghost in growing stuff in the ground in this spot and just cover the bare dirt with pots to keep down the weeds.

Lots of chilies at various stages of ripeness.


Cucumber winding down and some autumn plantings.

This bathtub has definitely added to my growing space. Unfortunately by the time I got it at Christmas time it was a bit late for much to get going. I managed to harvest about five cucumbers off this Lebanese mini muncher vine which is starting to succumb to powdery mildew. I've put in some autumn seedlings and am keeping the vine in until the last of the hot weather dies off to give the new plants a little shade protection. Autumn plantings include kholrabi and purple cauliflower. On the edge of the tub is a red russian kale seedling in a milk carton wicking pot (post on these coming soon).

Sprouting green broccoli near the bathtub.
A few more pots keeping bare garden ground covered.

A collection of pots have been sheltering out of the summer sun under this tree and keeping the weeds down on the bare ground. I'll move these into sunnier positions for winter. The lemon and lime will move into a suntrap near our back door that will hopefully keep them happy and keep the frost off. Styrofoam wicking boxes will be home to my Asian greens for autumn/winter. One has tiny plants appearing and the other will be planted out once I harvest the basil. The two pots to the right under the net are blueberries. The pot in the back left has a quince tree in it that I managed to grow from a sucker on my established tree in Adelaide. Just at the edge of the pic on left you can see a bit of the pot which contains my finger lime - I'm not sure how this one will go in Canberra. A few weeks ago it was loaded with flowers but no fruit seems to have set.

Dwarf mandarin under-planted with rainbow chard
Pumpkin vine, sweet potato and tomatillo plants going strong.

This area is definitely my biggest in ground success by far. Behind our back fence is a walking track and along the backs of many of the homes people have trees growing. Our back space was mostly grasses and weeds when we moved in plus a few struggling agapanthus (you can see these at the back right, behind the sweet potato). When we first moved in I was unsure of planting veg in this space as most of the other things were established plants and I was concerned the mowing crew might inadvertently destroy my hard work. While I went back and forth on this I decided to just dig my food scraps and green waste into the ground out here as I didn't have my compost bins. Then I covered the space with cardboard and lawn clippings to keep the weeds down. When my dad brought over my plants at Christmas there were some tomatillo seedlings that I had started back in Adelaide and so I thought I may as well pop them in the ground here and give it a go. Along with that I threw in some pumpkin seeds and couldn't help myself in buying a sweet potato plant when I went to the nursery to get mulch.

Jap/Kent pumpkin hiding among the leaves.

Tomatillos in various stages of development. Fingers crossed for a big harvest and lots of salsa.

I thought that if I didn't get any crops at least I'd be able to use the pumpkin and sweet potato for greens. But as you can see there are a heap of tomatillos and some pumpkins. I'm not sure if these pumpkins will fully ripen before the frost hits so I wont be able to store them for use across the winter but they'll still get used up in soups and stews. The tomatillos will be eaten by the girls straight from the vine and the rest will be made into salsa verde. Not sure what's going on under the ground with the sweet potato but good growth above ground so hopefully it's happily building big tasty tubers for me.

Emboldened by my success I've planted carrots, beetroot and cauliflower seedlings underneath the various vines in this space. I'm using the vines to provide a bit of protection from the sun and digging dogs on their morning walk. Hopefully by the time the vines are dying off the plants are big enough to brave the big wide world alone. I'm also planning garlic and broad beans out here.

So, that's what's happening in the garden in the first month of Autumn.

How is your garden growing?
Have you managed to get any autumn seedlings in the ground yet?
Doing any mad preserving as the summer harvests wind down?
8

Using up your bread scraps: reducing food waste

22 March 2018
Using as much of a food as possible can extend to so much more than 'nose to tail' eating. For me it fits with my values around respecting the resources that have gone into making the things we eat and reducing food waste.

Since making my own bread we often have scraps around. Sometimes it's the end of a loaf that's gone hard before being used up or the uneaten crusts that the kiddos leave behind and even the crumbs on the board after slicing up a loaf. None of the ideas below are ground breaking but they are so simple to do, not to mention frugal too. They are also great strategies to implement if you are keen on reducing your kitchen food waste.

And probably most importantly they simply taste good.

Croutons

What's not to love about crispy tasty bite sized bits of bread? I make croutons from any chunks of leftover bread, including the aforementioned discarded crusts and petrified bread ends. I simply chop into bite sized pieces and pop into a container until I'm ready to bake them up, which is usually when I have the oven going for something else. Once you are ready to make them simply spread on a baking tray, drizzle with a little oil and sprinkle with seasoning of choice. Then pop them in a moderate or low oven to toast away – do watch them as they brown pretty quickly. Toss them on your salads or soups or do as my four year old loves to do and simply snack on them straight from the container.

Crunchy bread goodness

Adding to meals

If you want to skip all that crouton making palaver here are a couple of easy ways to use up chopped up leftover bread:

  • Sprinkle on top of any cheese topped dish destined for the oven
  • Strata – think savoury bread and butter pudding or fritatta with chunks of bread in it. It's a popular breakfast dish in the US but I think it's good any time of the day
  • Bread and butter pudding - an oldie but a goodie, I like to add some stewed or preserved fruit for a bit of a flavour lift.

Breadcrumbs

I can't tell you the last time I actually bought breadcrumbs. These days I simply scrape up the crumbs left behind on the bread board or in the bottom of the bread bag and store in an airtight container in the cupboard or freezer. I also add any crumbs from crackers or crispbreads to the mix too. These are an easy substitute for the bought variety and do add up surprisingly quickly. Home collected bread crumbs are usually a little bigger and less uniform than the commercial variety but I just call them rustic and go with it. If you can be bothered or are using a recipe that calls for a fine crumb they can be whizzed up in the food processor to make them a little finer.

Home 'harvested' breadcrumbs

Tasty tip - home collected breadcrumbs make great pangratatto for sprinkling on your pasta or veg for an added texture boost.

So there you have it. A couple of simple strategies to turn crusty bits of bread into tasty kitchen goodies.

Are you working on reducing your kitchen food waste?
Got any other ideas for using up those crusty bread bits?
Does anyone else out there collect their breadcrumbs or am I on my own on this one?
7

Foraging in your own backyard

20 March 2018
Foraging is all the rage these days. There are guides, tours and blogs dedicated just to foraging. I think it's a great concept - find food that nobody else is using and use it. What I really like is how it pushes us to rethink where food comes from and the fact that edible things are all around us. It challenges the perception that something must come from a shop or market to be edible.

I have dabbled in a little foraging myself. I especially love a good fruit find - a wild tree/bush or an unused suburban specimen. My first experience with preserving olives involved myself and daughters going on 'olive hunts' through our neighbourhood to source our goods.

I have also dabbled in the occasional foraged greens but I must confess I find most of these to be a little bitter. I'm probably also pretty lazy about trekking around to find them when there are so many greens you can easily grow at home. And also so many things you can 'forage' in your own veg garden to use as greens.

And so I'd like to introduce the concept of 'garden foraging' (an oxymoron perhaps but let's go with it for now as it sounds a little better than 'foraging for lazy people') - using parts of the plants you already grow that you haven't thought of using before.


Pumpkin leaves - a great 'greens' option for summer.

Leaves

So many edible plants have edible leaves. As a general rule the smaller younger leaves are better to use but if you add enough garlic, olive oil and lemon juice most greens can be coaxed into tastiness (even those bitter wild foraged options).

  • My favourite find here is pumpkin leaves. They have a really nice flavour and best of all they are available at the end of summer when most other greens are looking decidedly sad. Use liberally in place of spinach/chard.
  • Other edible leaves I've used include sweet potato, brassicas, beetroot, nasturtium, fig and grape. I have tried carrot and radish leaves as well but they didn't really do much for me personally.
  • Of course you'll also find all the weed greens in the average garden too if you haven't yet given them a go - chickweed, stinging nettle, mallow and purslane to name just a few.


Stems


  • Chard/silverbeet is probably the big one here. You can chop finely and add along with their leaves to the dish you had planned or use as a veg filler in soups and stew. Stephanie Alexander's Kitchen Garden Companion features a very tasty stem gratin and also stem chips (I haven't tried the chips myself).
  • Young sprouting broccoli stems make great crudite if you have them growing in the garden.


Rainbow chard stems are both beautiful and delicious.

Shoots


  • Pea and broad been shoots are great additions to salads and stir-fries in the spring when there is not much ready for harvest yet.
  • Shoots from the squash family (zucchini, pumpkin and squash) can be used similarly. I've mostly utilised these in pasta dishes. I remember reading once that the first sign of spring in an Italian market is the appearance of the very young leaves and tendrils of squash plants, called tenerumi.


Flowers


  • The squash family feature here again - stuffed flowers are a delicious, if fiddly, addition to the menu plan. You can also just chop them roughly and toss in many dishes along with their vegetable counterparts or solo. I've tried them in pasta sauces, on top of pizza and in gratins (eg. zucchini flowers in a zucchini gratin).
  • Nasturtium flowers can add a little pepper and colour to a salad.
  • Herb flowers can be used anywhere you'd use the leaves or as an addition to herbal teas.


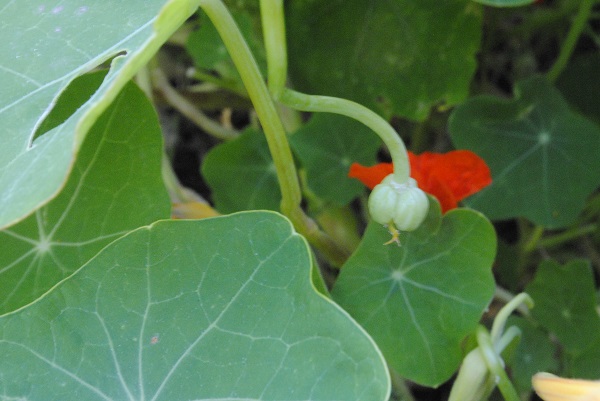
Nasturtium leaves, flowers and seeds are all edible.


Seeds

Saving your own seed is a great gardening habit if only for your next year's crop but there are many ways you can put these foraged goodies to use aside from sprouts and microherbs.

  • Once roasted, pumpkin seeds are delicious as a snack or as added crunch to any number of dishes. Definitely my most utilised seed in the kitchen - I can't believe how many I threw into the compost before I knew of their tasty goodness.
  • Nasturtium seeds are also garden gold as they can be turned into a substitute for capers. I finally made these last summer and have found them just as good as capers themselves. Which is handy when you have managed to kill at least two caper plants (even though they can apparently grow wild out of rocks and thrive on neglect).
  • Herb seeds can also make a nice addition to homemade teas. My favourites to use are fennel and coriander.


So there you have it, a crash course in 'garden foraging'. The easiest way to increase your garden yields without increasing your gardening efforts.

Have you tried foraging in the wilds or your own backyard?
Any interesting bits of plants that you use in the kitchen?
9

Here and Now

17 March 2018
I love reading blogs. I love being invited into people's daily lives, to see a glimpse of how other people are doing things, to feel a little less 'different' when you are not living like everyone else around you. I love the feeling of connection.

A roadside foraged bowl of apples awaiting some sort of preservation treatment on the bench.

I've enjoyed the Say Little Hen blog for sometime, particularly the beautiful photography and cute knitting projects (looking only at this stage but one day...). So, I thought in my first month of blogging I'd link into a little series that Sarah has been running for some time. Here goes....

Loving // Feeling inspired and motivated to put a little bit more of me back in my life. After 4 years of being at home with my beautiful kids I'm slowly starting to carve out some time for me and a few projects I've had bubbling away in my brain for a while (hence the new blog).

Chillies on the bush starting to ripen - I think i'll have a go at pickling some this year

Eating // Just now a quick lunch of cheesy pasta while I make the most of a kid free day to get some stuff done. More generally at the moment I've been enjoying a few lunchtime soups in the cooler weather.

Drinking // Water at the moment, but I did just prep up a glass of ice coffee and pop it in the freezer to enjoy icy cold in a little while. Loving icy cold coffee this past summer.

Feeling // Inspired (as above) and tired. My youngest did not sleep the best last night ergo I did not sleep the best. Do you think she knew that I had penciled in today to be my get stuff done day?

Making // Cucumber pickles. I planted 3 vines in November and am picking enough once or twice a week at the moment to put away a jar of either vinegar pickled or fermented cucumbers for the months ahead.


Baby cucumbers and plenty of blossoms on the vine.

Thinking // Of all the things I would like to get done today....and trying to maintain some perspective of my physical limits! Trying not to think of all the things that I should be getting done while I'm on my own. Also thinking of good friends - I caught up with a high school friend during the week to meet her gorgeous new bubba and it reminded me how nice it is to connect with someone who knows so much of your life and share your hopes and dreams with them as well as catch up on the day to day minutiae.

Dreaming // So. Many. Things. I'll pick an easy one today: an uninterrupted nighttime sleep.

I'd encourage you to head over to Sarah's blog for a peek around and enjoy the beautiful pics and thoughtful posts. And if you found me through the link up - hi and welcome to my new little space on the big old web (please say hi and introduce yourself in the comments below).
9

Vinegar pickled cucumbers

13 March 2018
I must confess that I am a bit of a pickle fiend. Growing up we always had a jar of sweet spiced gherkins in the fridge. These were usually destined to be thrown on a classic 80s platter along with pickled cocktail onions (all three colours of course), cubes of cheese and chunks of cabanossi (or cabana depending where you live). Ah the 80s.....

10 green cucumbers sitting on a wall....

I started pickling my own cucumbers a few years ago and haven't looked back. I like that I can adjust the taste and spices to my preference. I also like that I can source local cucumbers (sometimes even from my own backyard) and produce a little less waste.

There will always be a jar of vinegar pickled cucumbers floating about in my fridge. I enjoy them straight out of the jar or served up on a tasting platter, especially alongside rilletes. They also go great with hamburgers and sandwiches - on top or on the side. A few finely chopped pickles will definitely add a little tang to any number of things - potato salad, mayonnaise based sauces and a variety of fish dishes. Once you're done with the pickles you can then use the leftover pickling liquid in dressings and sauces, waste not want not.

Each summer I try to put away enough for a full year's worth however I haven't managed to get them to last that long yet. It seems both my daughters have inherited my pickle munching ways. I think we made it until September last year before needing to top up from the supermarket. Room for improvement this year.

Cucumbers sliced up and lightly salted - step one.


I also experimented with fermenting cucumbers last year and am keen to add more of these to the stash this season (read about it here if you're interested). However, because they live in the fridge (i'm not quite game to keep my ferments out permanently) i'll only be able to make a few jars, so the bulk of the pickle action has to be vinegar pickled.

My go to recipe is a woman's weekly number that you can find here. It's simply a matter of salting the cut cucumbers overnight and then combining with a pickling liquid. I do differ from the recipe a little. I used to simply hot pack the cucumbers and hot brine in hot sterilised jars thereby forming a seal. But one year I had a few jars that didn't seal correctly and started to ferment a little in the jar. It was a sad day when I had to empty these into the compost. So now I process them using a water bath. I have a fowlers vacola unit and so I use that, but you can simply use a pot on the stove top (for more info on water bath canning you can find great stuff online, I often refer to the Ball canning site Fresh Preserving but there is a heap of information out there).

If that sounds a little too much at this stage of your preserving journey then follow the linked recipe and just store them in the fridge. Easy peasy.

Squished into jars and awaiting some pickling liquid.


Are you of the pickle loving persuasion?
Have you ever tried or wanted to try pickling your own?


2

My food and cooking journey: from budding chef to values based eating

11 March 2018
When I was about eight years old I decided I wanted to be a chef. I'd been on holidays to my cousin's house and she was all about cooking at the time. We spent the week together cooking up a storm in her family kitchen because she had recently decided she was going to be a chef when she 'grew up'. I had always loved baking but had actually had my sights set on writing as my future career. But suddenly a spark was lit.

I don't think I really knew there was such thing as a chef before this point. I grew up in a small rural town on home cooked food with the very occasional take away (I'm talking a few times a year) – no chef cooked meals in sight. I would safely hazard a guess that there were no chefs in my home town at all and I had definitely not sampled any meals cooked by one. What a revelation – you could cook for a living.

Once my mind was made up that was it. I set to learning everything I could about cooking. Every birthday I received recipe books and cooking paraphernalia. I remember cooking my first meal for the family at age ten – a chicken and mushroom casserole from my family circle kids cookbook. It was such a sense of accomplishment.

I think that is a big appeal of cooking for me. You set out to achieve a goal and in a relatively short time you complete it. It may not always go to plan but that doesn't particularly matter to me. Every time a recipe fails or I go too rogue and mess things up I  generally learn something that makes me a better cook (trite as it sounds). But the feeling of creating something from a few ingredients is empowering really. Of course it helps that cooking and eating is a very tasty endeavour indeed.

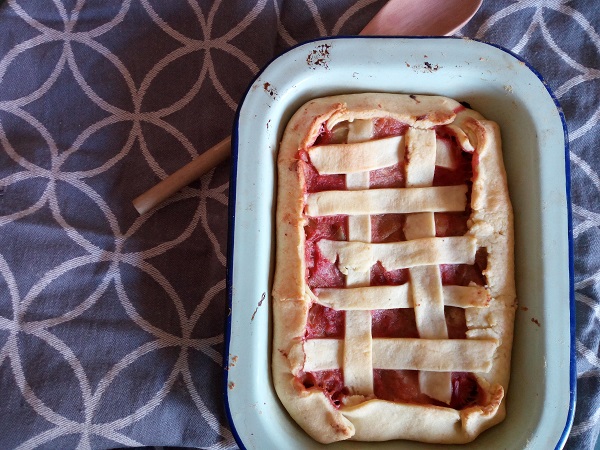
Apple and Rhubarb Pie.


Over time my plans changed and I didn't actually pursue a career as a chef but I did stick with the food theme and I stuck with cooking. Cooking is such a part of me, a part of my identity as well as being an integral part of my way of life. If you asked anyone in my life what is important to me or what comes to mind when they think of me food (or some connection to it) would definitely make the top three.

My cooking style has slowly evolved too of course. From learning the basics, to experimenting with new ingredients to challenging myself with different techniques and now to cooking as much as possible myself, from scratch, in line with my food values.

More and more I'm drawn to cooking as a way to connect. It connects me to the food I grow and buy. It makes me aware of where that food comes from. It also connects me to people, to family, to friends and to community. Food is so effective as a tool to connect us to others.

Food also connects me to many of my values. Particularly around simple living and sustainability. I'm not perfect by any means, I don't always make the 'best' choice but the act of buying food each week keeps me reflecting on the choices I make. It helps me to recognise the power of those choices in shaping my connection to my food and my ability to walk the walk not just talk the talk. Room for improvement to be sure.

Simple, seasonal meals.

The more I grow for myself and make from scratch the less I'm faced with the dilemmas of choice. Doing it yourself gives you so much more control (but it also takes a heck of a lot more time!). But unless I'm going to become completely self sufficient choices will always be there. There will always be room to grow and change and learn. And also room to compromise and make the best choice I can for my circumstances at any one time. And I think that's the best we all can do really. Make the choice that works for us at the time, with the information we have at the time.

So, I'll continue to deepen my connection to food. I'll keep gathering more information to help guide my choices. I'll keep my values to front of mind. I'll keep cooking. I'll remember to honour my love of good quality, simple, tasty food. And hopefully I'll pass that on to my kids.

Do your values guide your food choices or your cooking style?
What did you want to be when you grew up?
2

Baking my own bread

08 March 2018
When I was a kid I rarely ate bread. Growing up in a small rural town it was generally the generic fluffy white bread option and I just didn't like it. More specifically I hated the taste of the crust – it used to make me gag. So everyday I took my crispbreads and spreads to school in lieu of the standard 1980s sandwich for lunch. Toast was ok but 'fresh' bread – no way.

Sourdough fresh from the oven


The first time I tasted good bread was when I was staying with a friend's family in Canberra while doing a uni placement. Her mum was having mothering withdrawals and so looked after me rather well. When I got home from work on the first day she made me toast – woodfired italian bread toast. It was a revelation to me. The chewy texture, the crunchy crust, the actual flavour. It opened my eyes to what bread could be (later my palate was completely blown away when I first went to Europe and tasted all they had to offer). And so bread made its way back into my life.

I started baking my own bread about five years ago when I had begun my endeavours to make more things from scratch. I sampled a few different recipes and settled on this five-minute bread recipe from one of my favourite blogs. It made a great loaf, was easy enough to do during the week, around work and later with a new baby (well newish, I don't think I got back into bread baking for at least 6 months or so). I've since passed this recipe onto countless people who have expressed their interest in baking their own bread and it has been universally successful. Even for my mum who has been scared of cooking with yeast my whole life. So if you are looking for a place to start or have been thinking about making your own bread, even just occasionally, I can't recommend Rhonda's tutorial enough.

Tasty 5 minute bread


My interest was piqued in giving sourdough a try when I had a newborn. Hours on the couch feeding led to lots of reading of things that I wanted to be doing but wasn't – namely gardening and cooking. I lived vicariously through books and blogs (I always have and still do). Sourdough seemed the ultimate in making bread from scratch, paring things right back to the basics of just flour and water. When it comes to trying something new though I generally don't rush. Which in this case was a good thing seeing as there was no way I was going to be able to look after a starter and a baby at the same time.

Fast forward a year or so and I was ready. I'd over researched sourdough starters and beginner loaves and I no longer had a newborn on my hands. My friend gave me some starter. I killed it. Or thought I had at the time but in hindsight, and a few years experience with the occasionally neglected starter, I realise I probably could have coaxed it back to life. It was probably for the best though as I think actually making my own starter from scratch gave me a greater understanding of the flexibility of sourdough. Despite my extensive research into starting a starter I did what I always do and winged it a little. I wasn't exact with my daily feed measurements and I even used plain old all purpose no brand flour to start. It worked out and my original starter is still going strong.  I also must admit that in further bucking of my sourdough research I didn't even name my starter – every now and then I try and think of a fitting name but my starter remains nameless.

My nameless starter getting ready to do its thing.

Bread baking has become a part of my routine now. There are times when I bake more and times I bake a little less. Recently when we moved interstate I didn't bake at all for a few weeks either side – occasionally I remember to keep food prep expectations in line with what is happening in life. But I did put my starter to bed and bring it with me in the esky (along with a few other fermenting friends) and got back into things once the dust settled on our move. This year I'm planning to do a little more perfecting of my everyday loaf and also a bit of experimenting. I'm particularly keen to find a good fruit loaf and a sandwich loaf with a softer crust for my girls because they ALWAYS leave the crunchier crust behind. I'm no expert but I'll share a few of my bakes with you here in the hopes of inspiring you to give it a go and as a handy way to keep track of my efforts.

Are you a bread baking enthusiast or aspiring to be one?
Do you too research things to death before taking the plunge? Or do you take action first and ask questions later?
Have you got any go-to recipes that I should add to my 'must bake' list?
7

Making fermented cucumber pickles

05 March 2018
My first attempt at fermenting cucumber pickles last summer was a taste revelation....and a textural failure! My second attempt was a success on both fronts - I was hooked. Unfortunately it was the end of the cucumber season so once the jar was empty I had to wait.....

The first step this year was to grow the cucumbers. The textural failure last year was the result of using large cucumbers and cutting them into spears like I normally do with the vinegar pickled variety. However, once the little fermenting microbes had their way with my cucumbers they were a little on the mushy side. You definitely need the small whole cucumbers. These are a little harder to come by so I wanted to grow my own.

Pickling cucumber vine growing nicely. Lots of flowers...yay!

Second step is to wait patiently until you have enough to fill a jar or two. Unless you have a lot of vines you are unlikely to have enough cucumbers at the right stage at the right time to fill too many jars. Feel free to buy some small cucumbers and skip the first two steps.

From here on in it's a pretty simple process. Give the cucumbers a wash and trim off the blossom and/or stem if needed. Stuff them in a clean jar with some garlic and herbs. In this batch I used a bay leaf, two cloves of garlic halved and some peppercorns. The limit here is your taste preference - dill, fennel, caraway, coriander or mustard seeds would all work well. You can find plenty of suggestions and recipes on the interwebs too.

Cucumbers and spices in the jar.

Next you cover them with a brine. For this batch I used 2 tablespoons of salt in 2 cups of water. First dissolve the salt in half a cup of boiling water and top up with cold. Then just add enough to your jar to cover. You may need to wedge your cucumbers together or under the neck of your jar so they stay submerged.

Cover your jar with some muslin or just balance the lid back on top loosely - you don't want any bugs or things to get in but you want the fermentation gases to release. Place somewhere out of direct sunlight where they wont be disturbed for 3-10 days. I generally leave mine for around 3 days but it depends on your taste preference - the longer you leave them the more fermentation will occur. Also, they will still ferment slowly once in the fridge.

After 3 days on the bench. You can see the bubbles and cloudiness of the brine.

Then you simply pop them in the fridge until you are ready to enjoy....after a sneaky sample of course.

Are you a pickle kind of person?
Have you been bitten by the fermenting bug (pun intended)?
1

Search This Blog

2018. Powered by Blogger.